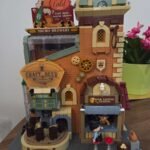

Independent Review: I bought this set myself from Chowbrick for $70.19, which was around £53 at the time. This review is based on the full build and reflects my honest experience.
The Lumibricks Corner Photo Studio 19016 interested me from the moment the first images appeared. Not because it is the biggest Street Fusion building, but because it does something I want to see more often: it fits a complete modular-style experience onto a narrow 32 x 16-stud footprint.
I love a full 32 x 32 modular, but not everybody has unlimited shelf space or a brick city with room for another enormous corner building. Smaller modules such as the Corner Photo Studio give you far more freedom. They can fill awkward gaps, sit on a shallower shelf or break up a row of larger buildings without looking like an afterthought.
After building it, I think this compact format is one of the set’s biggest strengths. More importantly, Lumibricks has not used the smaller footprint as an excuse to reduce the ideas inside. There is a working backdrop changer, a huge old-fashioned camera, a detailed darkroom, two lighting modes and a separate photo booth. It is small, but it is not short of things to look at.
Quick Summary
| Pros | Cons |
|---|---|
| Excellent use of a compact 32 x 16-stud footprint | Ground-floor access is more awkward than it should be |
| Two distinctive interiors with strong storytelling | Exterior staircase blocks part of the pavement |
| Fun rotating backdrop and camera-flash functions | |
| Excellent printed details and no shortage of signage | |
| Red darkroom lighting is especially effective |
A clever, characterful small modular that delivers far more than its footprint suggests. The lower-floor access and pavement-blocking stairs are genuine design misses, but the finished studio is still one of my favourite sets of the year.
Set Information
| Set Name | Corner Photo Studio |
| Set Number | 19016 |
| Theme | Street Fusion |
| Piece Count | 1,425 pieces |
| Printed Parts | 40 printed elements |
| Figures | 2 figures |
| Lighting | 7 LED lights across two independent systems |
| Dimensions | Approx. 25.5 cm wide, 12.5 cm deep and 23.5 cm tall |
| Power | 3 AAA batteries, not included |
| Official Price | $79.99 |
The Build and Instructions
The set is divided across seven numbered bags and feels like a familiar Lumibricks modular build, just condensed into a shorter session. I built much of it with a World Cup match on in the background, which is a useful test of whether an instruction manual is going to demand too much attention. For the most part, it did not.
The early stages are particularly good because the ground floor is not simply layers of walls. You assemble the geared mechanism that will eventually rotate the photography backdrops, then build the studio around it. It gives the foundation a purpose and makes the function feel properly integrated rather than added at the end.
Everything fitted well and the lighting cables were manageable. The printed manual is clear, colours are easy to distinguish and the pacing is sensible.
The Ground-Floor Photo Studio
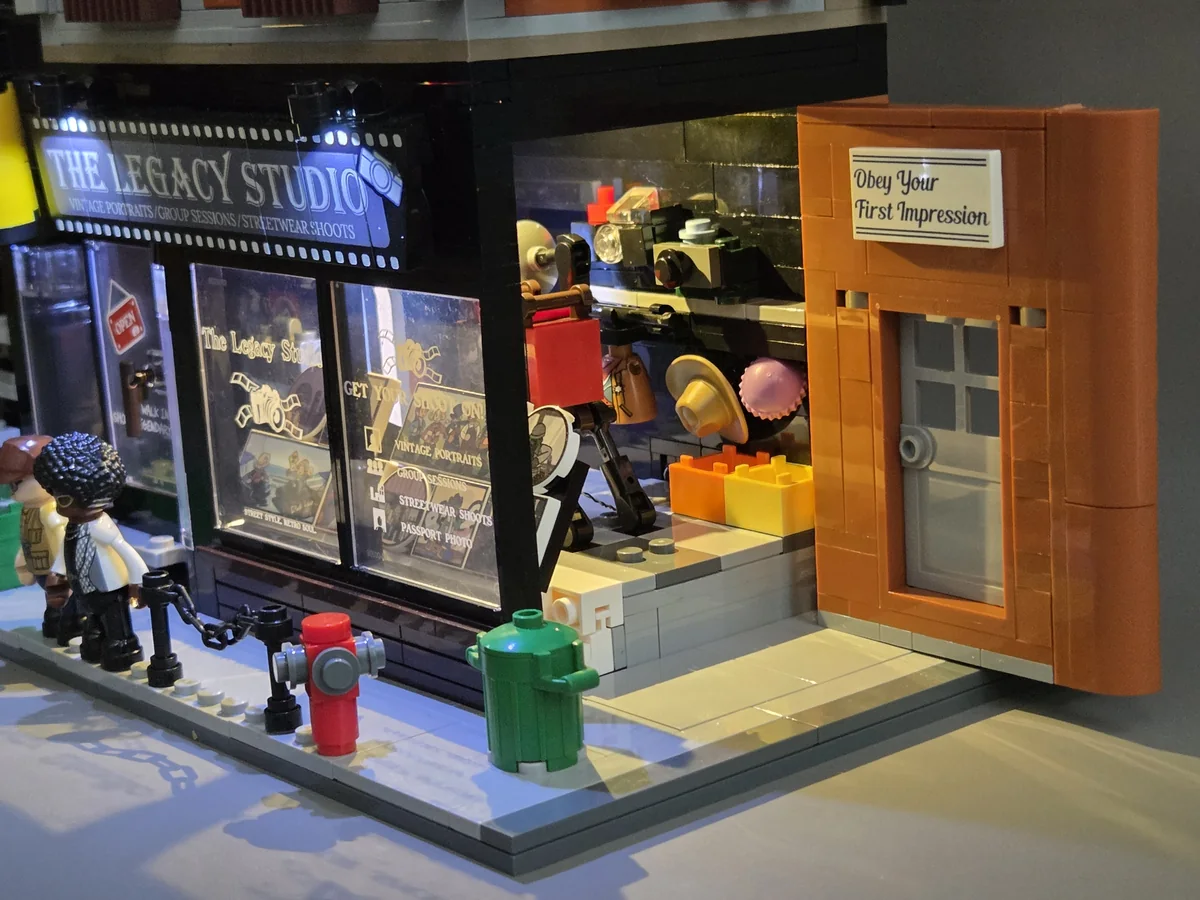
The ground floor is the most playful part of the set. The large camera immediately catches your eye, complete with an oversized flash bulb that feels wonderfully old fashioned. Around it are hats and props for the customer, along with the curved purple area where the subject stands.
The main function is the rotating backdrop. Turning the geared mechanism changes the scene behind the customer between an Old West setup and a colourful underground album wall. Both sides use proper brick-built details and printed pieces, so it feels like a real scene change rather than a flat panel being turned around.
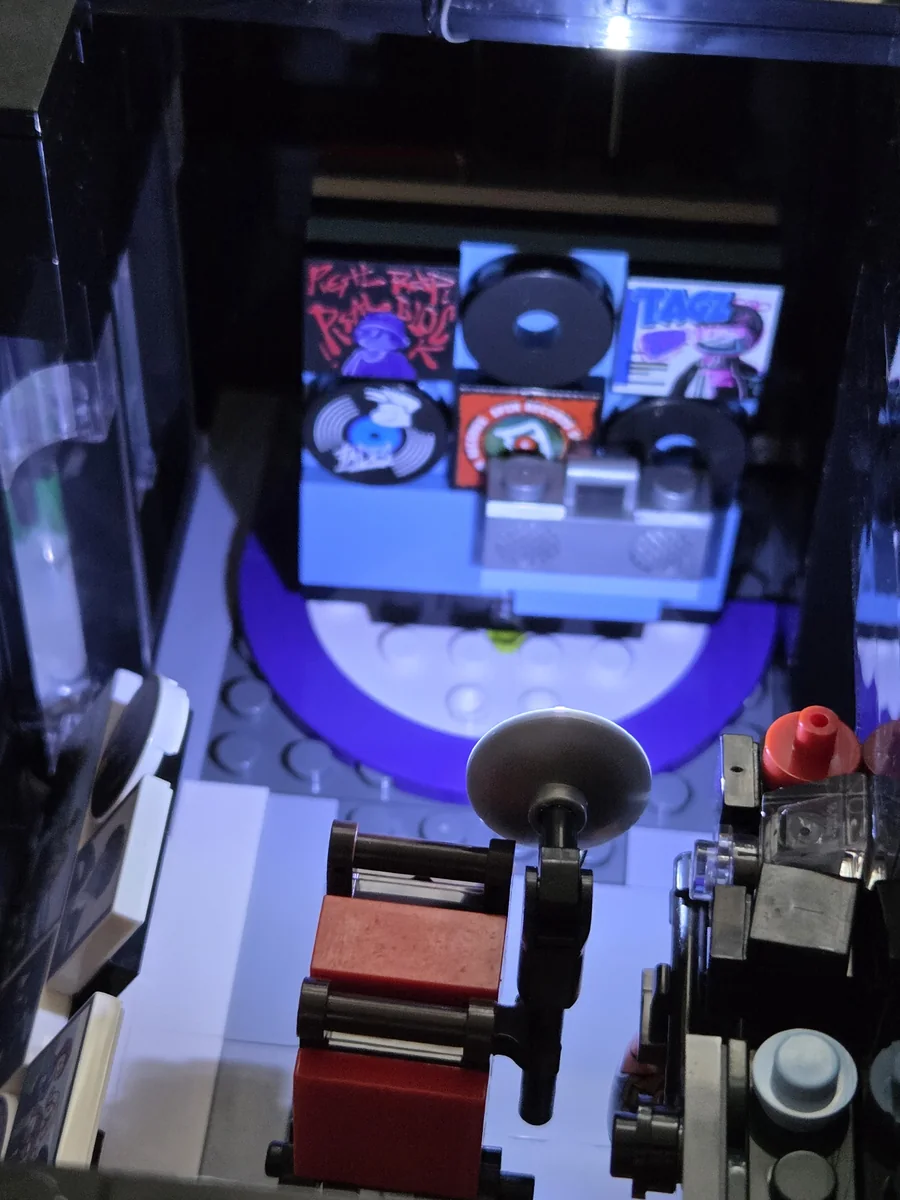
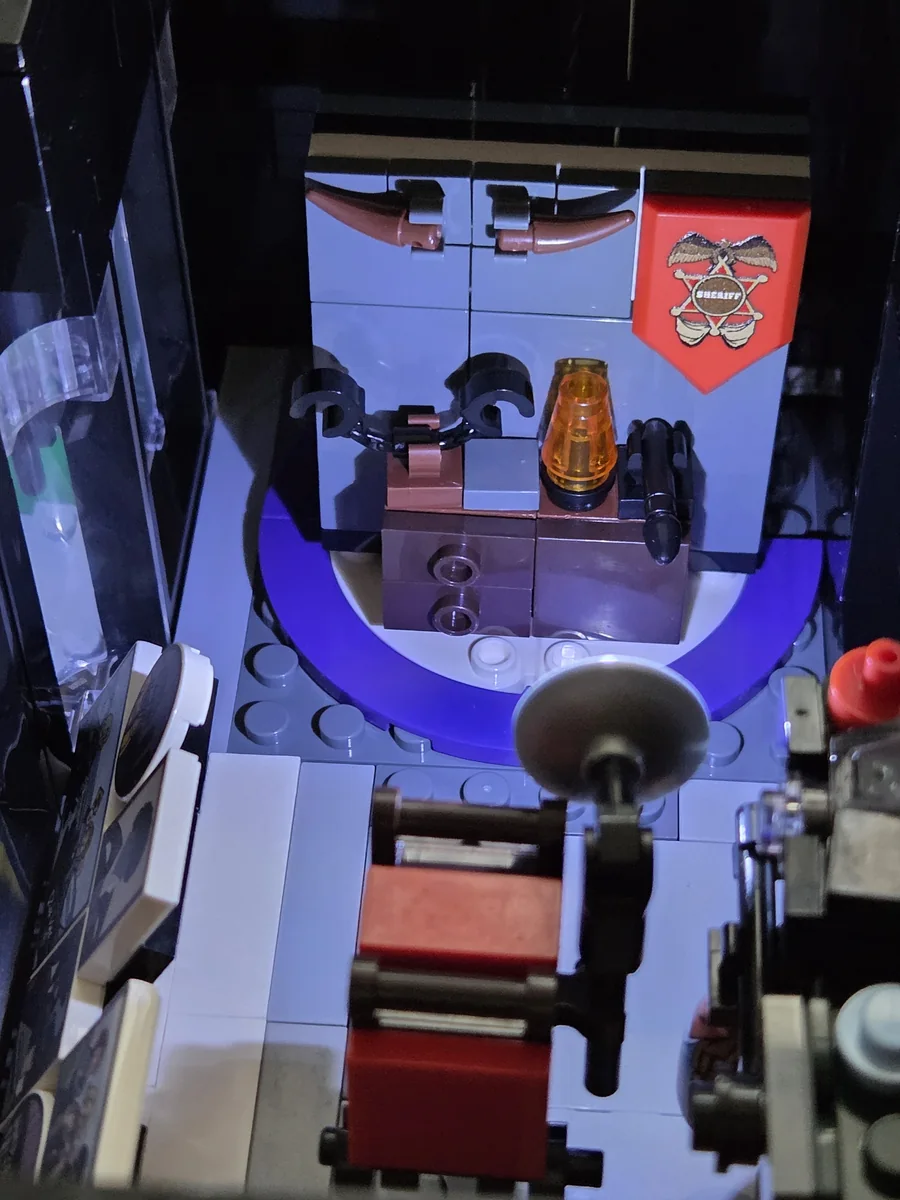
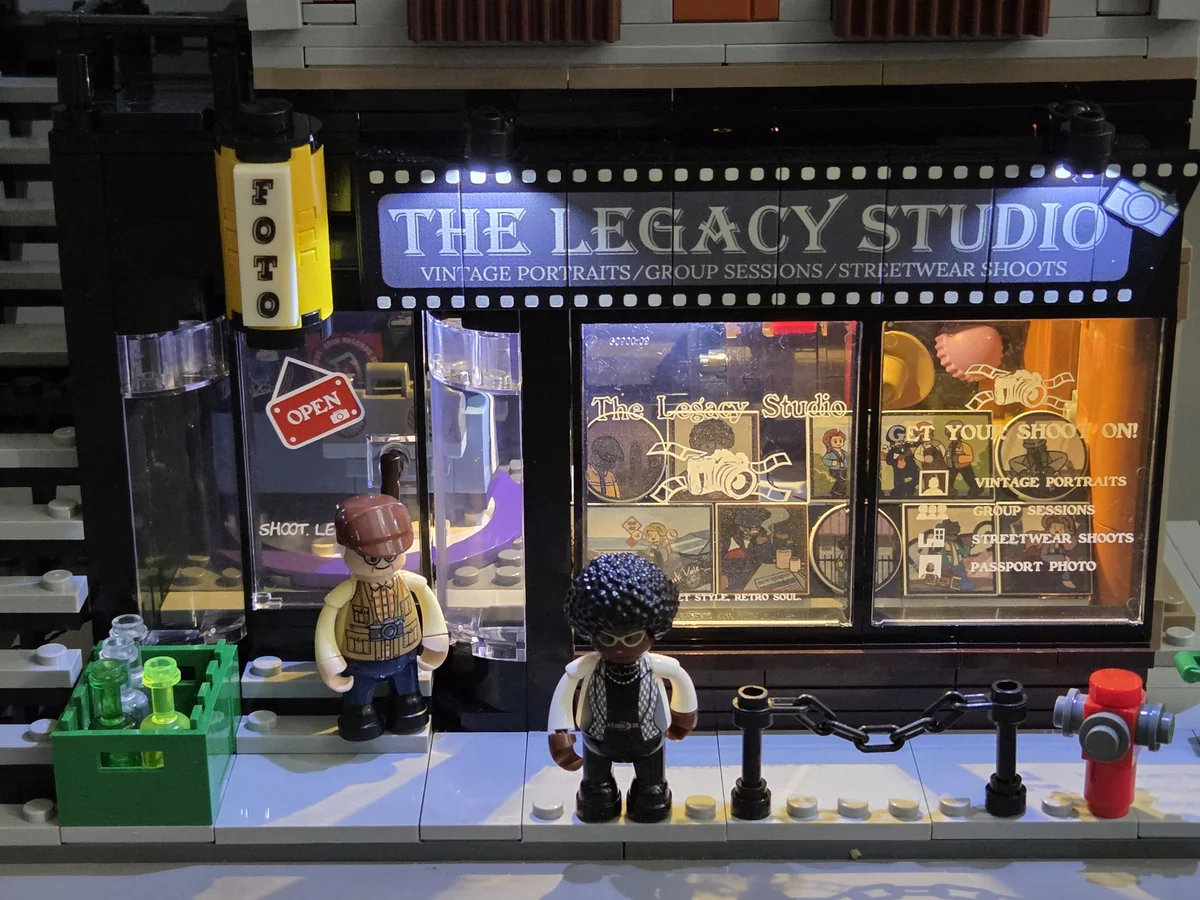
The shopfront is equally busy. The large The Legacy Studio sign is one of the best prints in the set, while the clear front windows advertise vintage portraits, group sessions, streetwear shoots and passport photos. One of the photo-display panels can also slide out, which is a small but satisfying extra feature.
My main complaint is access. The entrance and the right-hand side wall hinge open, but this is the smallest wall on the room and it does not give you much space to position figures or reach the camera. In practice, I found it easier to remove the upper floor. A rear opening wall or one of Lumibricks’ excellent slide-out floors would have worked much better here.
The Upper-Floor Darkroom
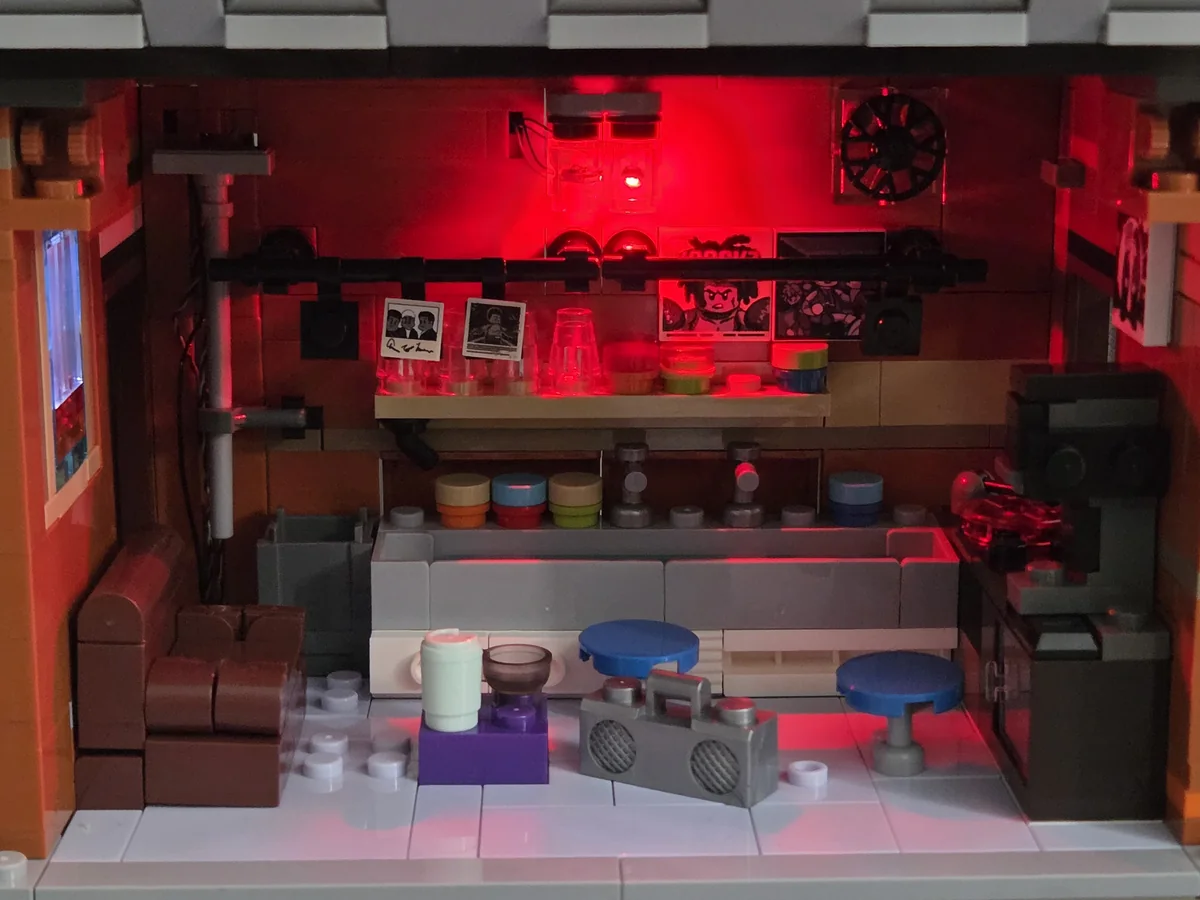
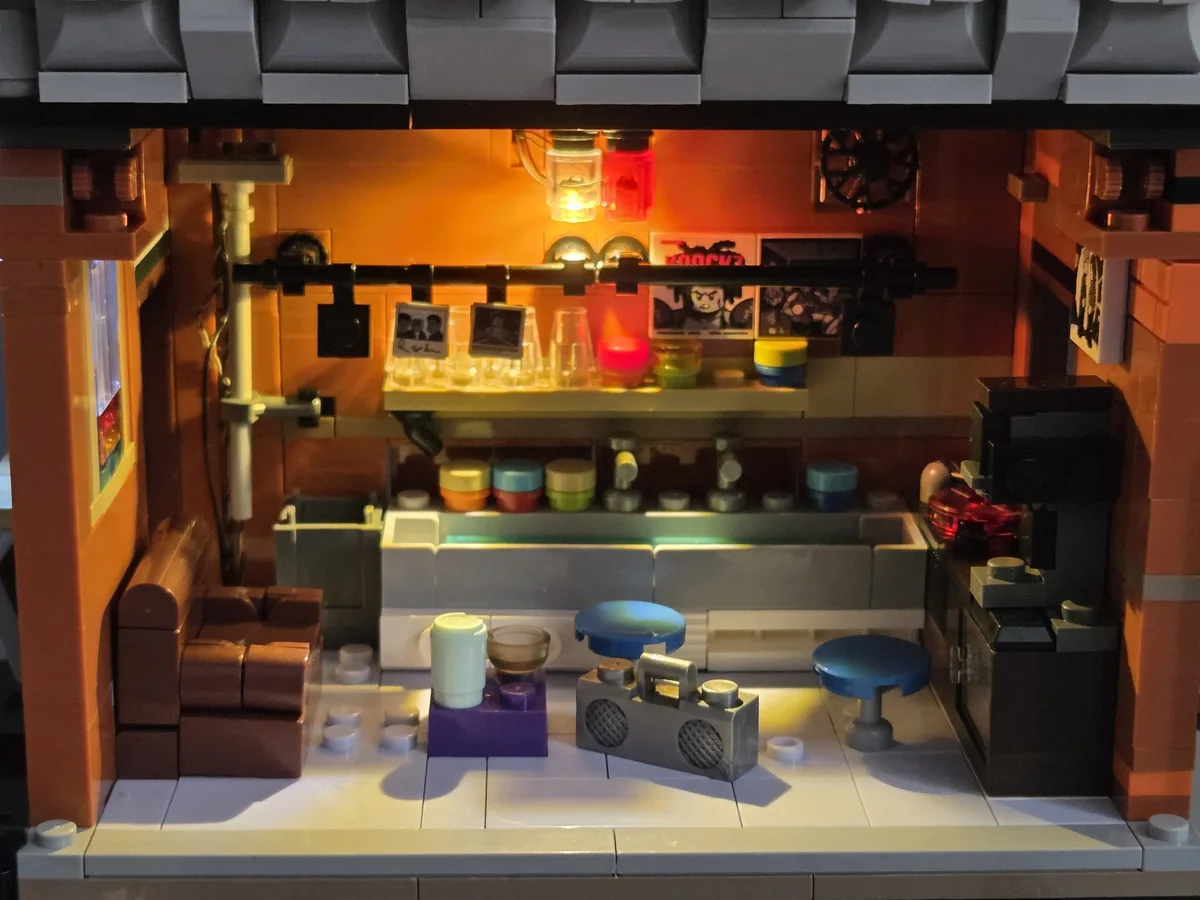
The darkroom is my favourite interior. It has a long sink and water supply, shelves full of chemicals, little trays and tiny black-and-white photographs hanging up to dry. There is even a large enlarger tucked into the side of the room. It feels busy without becoming unreadable.
The removable front wall makes a huge difference here. It pulls away cleanly, gives you proper access to the entire room and then locks back into place securely. You would not know it was removable from the finished exterior, which is exactly how this sort of feature should work.
The lighting completes the room. One setting gives you the proper red darkroom effect, while the other switches to a normal warm light so you can actually see the details. Both look good, but the red mode is the one that gives the upper floor its identity.
Exterior Design
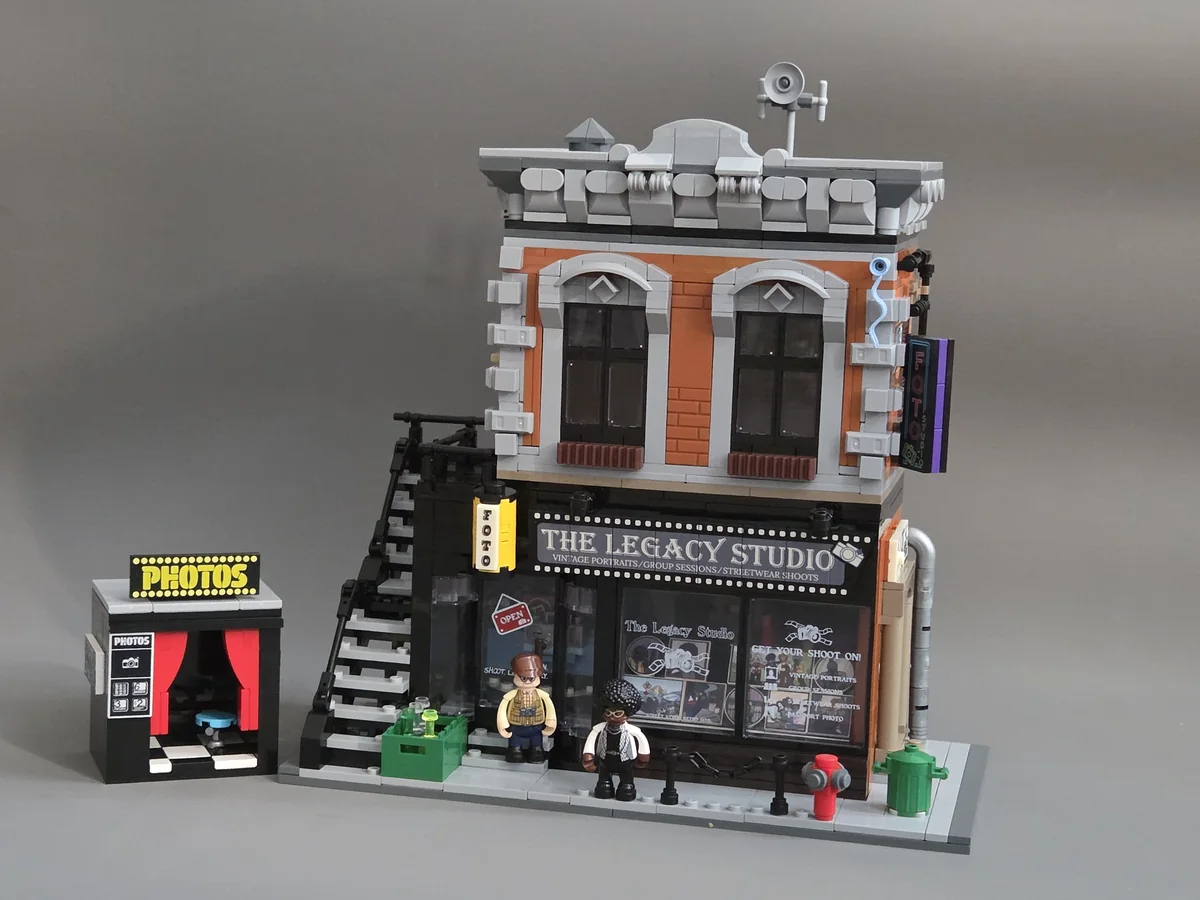
The exterior works because the two floors are visually different without looking like separate buildings. The black ground floor feels like a modern shopfront, while the red-brown brick and grey stonework above give the building some age. The upper window arches and chunky stone cornice are especially effective.
The roof itself is fairly simple. There is a chimney-like structure, a satellite dish and enough grey stone detailing around the edge to finish the building properly. It does not compete with the facade, which is probably the right choice on a set this narrow.
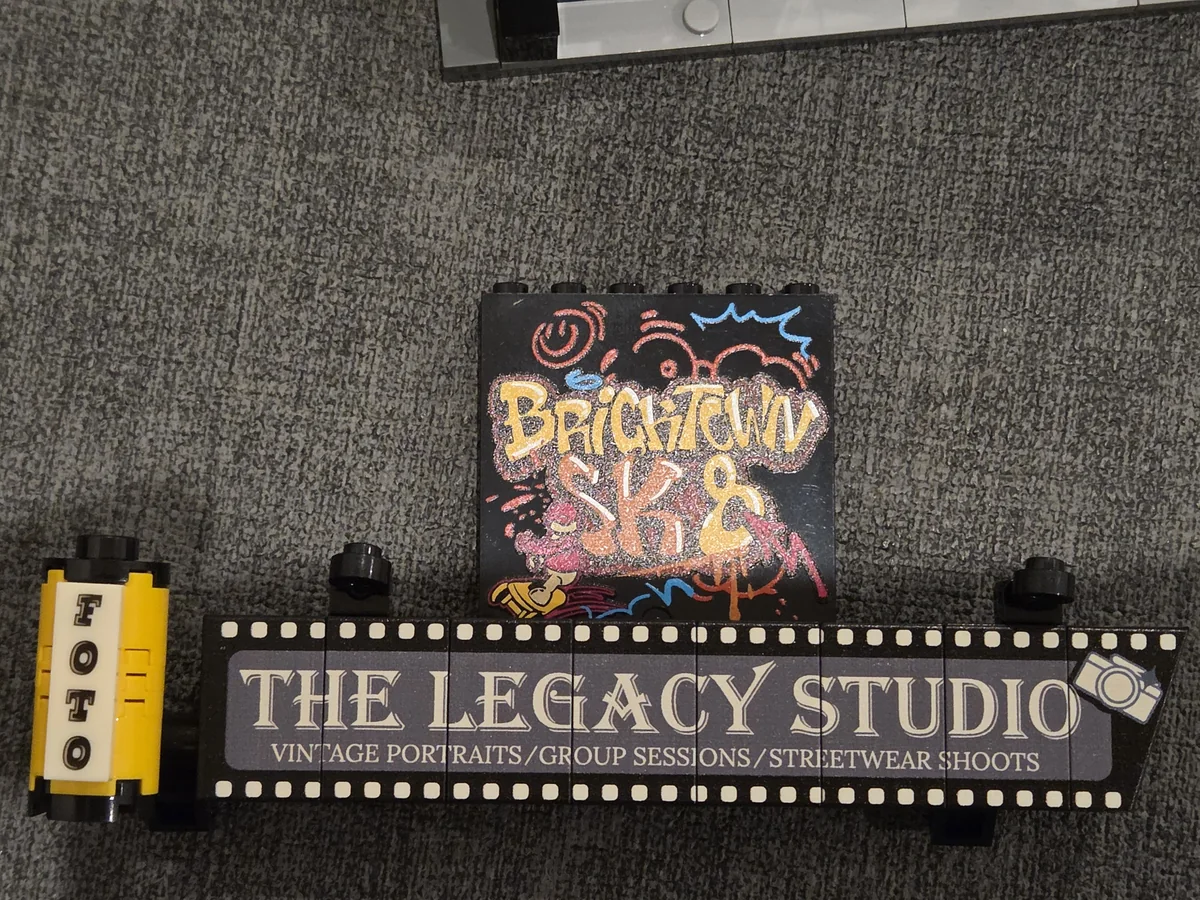
The side walls continue the Street Fusion style with large graffiti prints, a vertical FOTO sign, external pipework and a black staircase climbing to the upper floor. The printing is excellent throughout. The signs are crisp, the fonts fit the setting and the graffiti does not feel randomly applied.
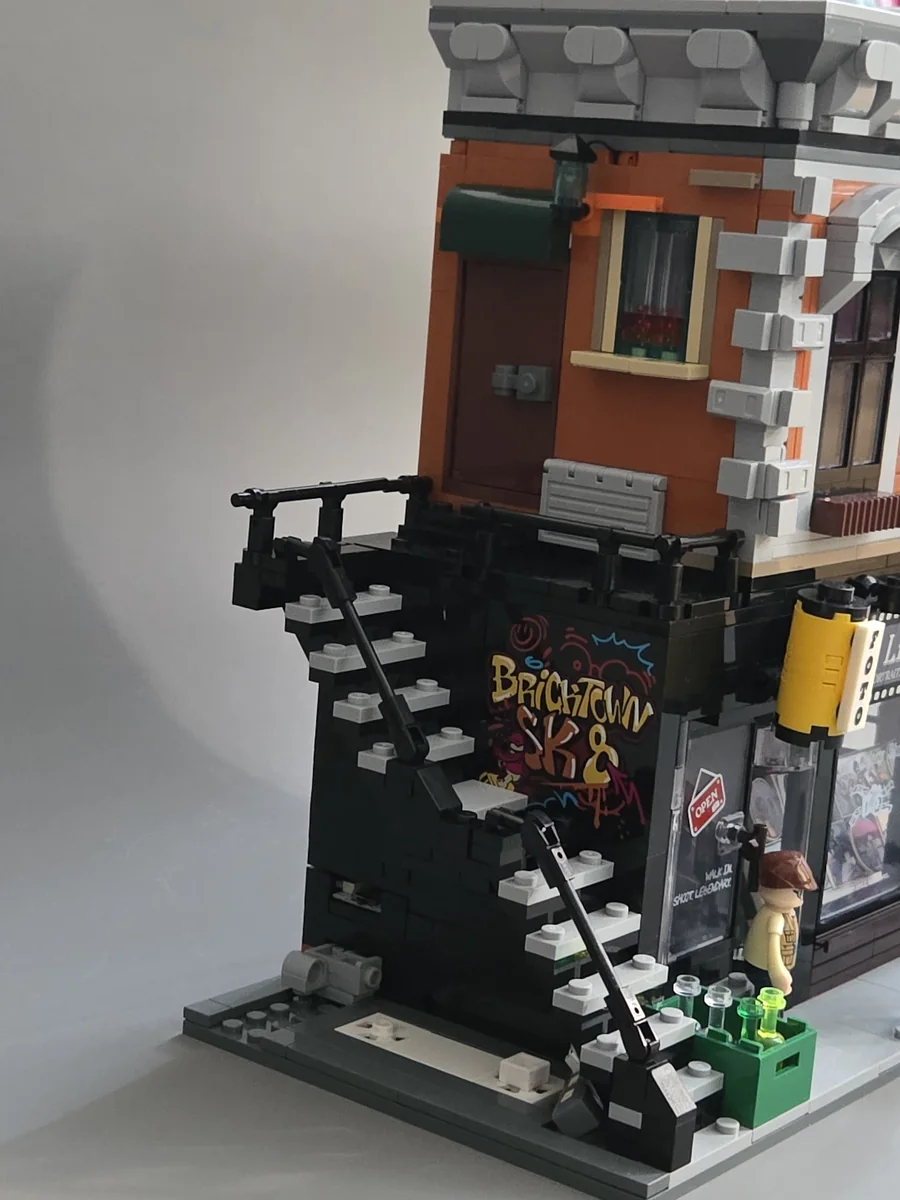
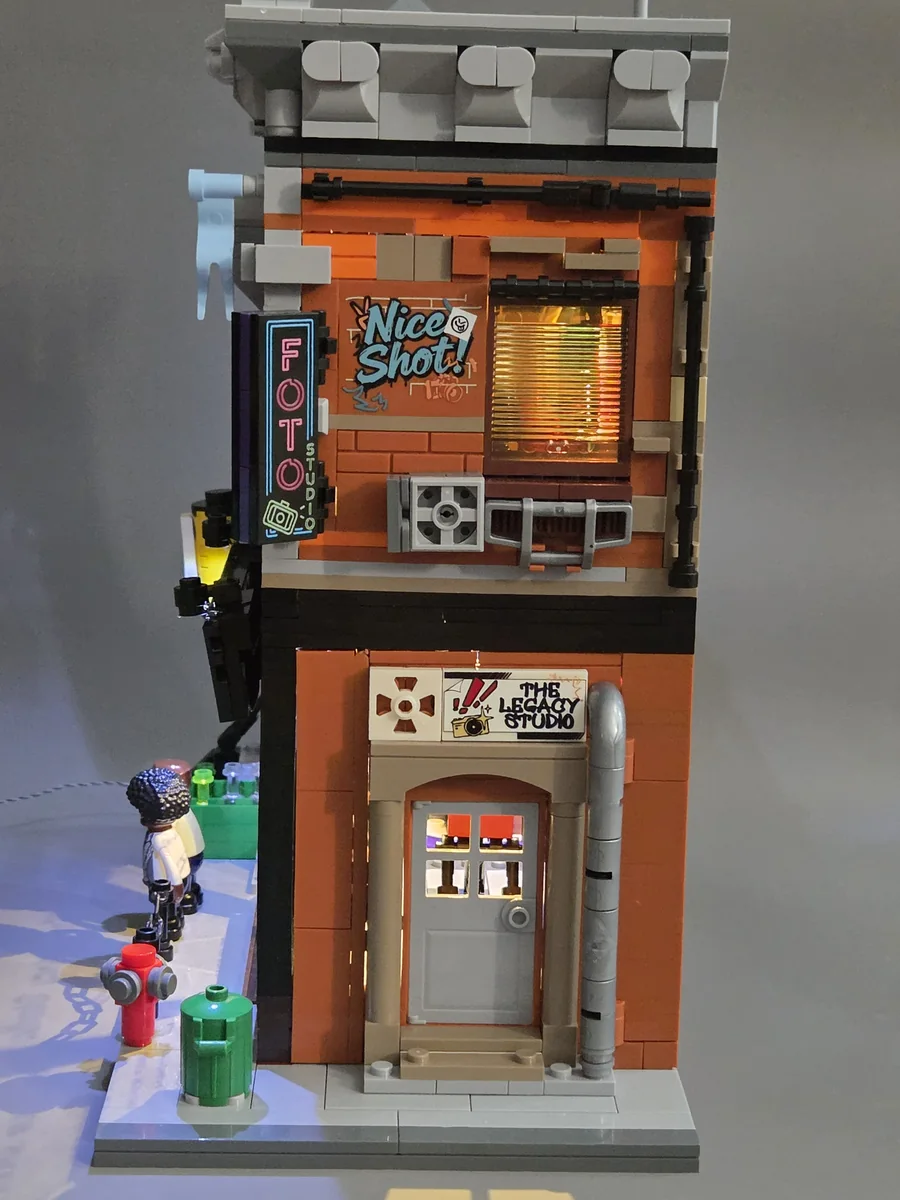
The two side elevations have very different characters. One is dominated by the staircase and large graffiti print, while the other has a service door, drainpipe, air-conditioning units, the vertical studio sign and another large Nice Shot print. It is good to see both sides receive proper attention on such a narrow building.
The back is much plainer. The lower floor is almost entirely black wall, while the upper floor is a simple red-brown surface with a narrow tan stripe. That is perfectly practical if the studio will sit against a wall or another modular, but it is worth knowing if you plan to display it where every side can be seen.
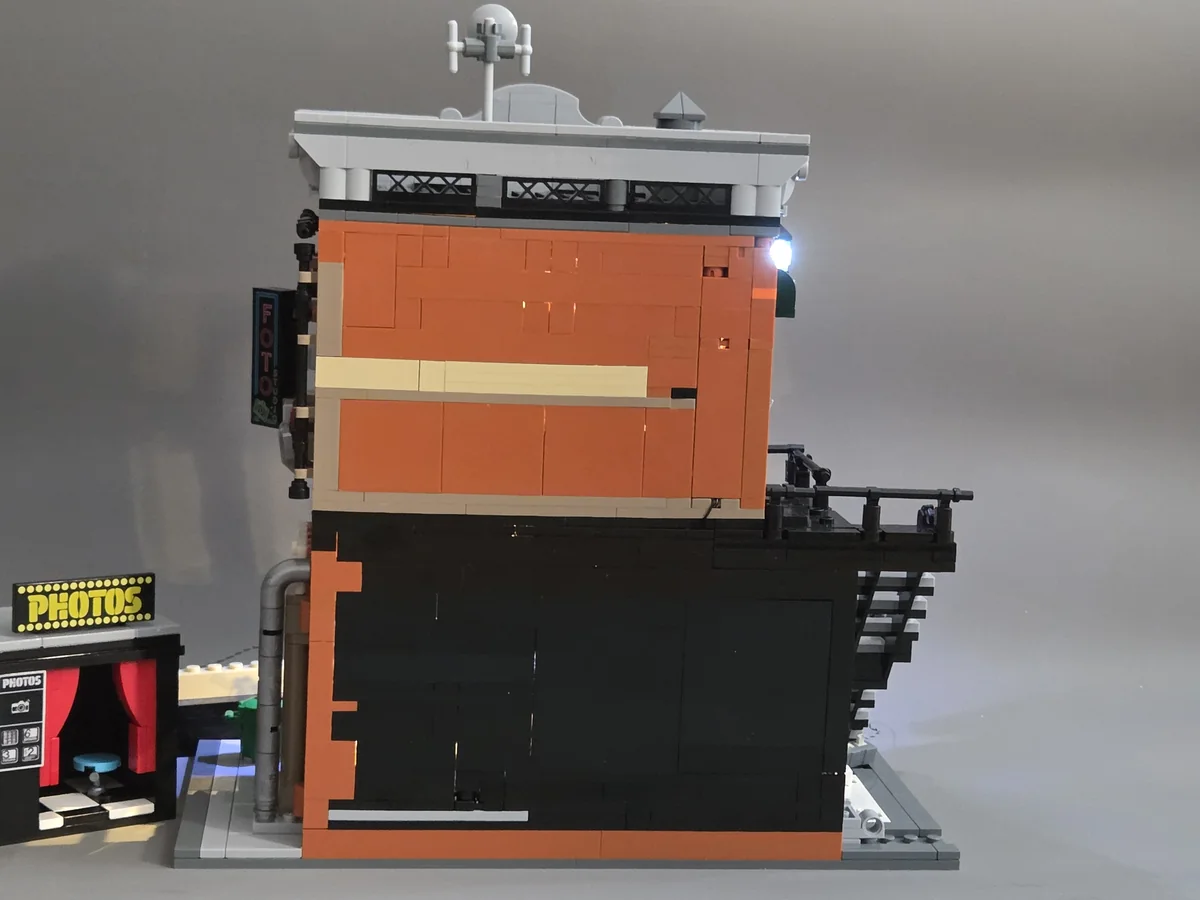
A Staircase With No Pavement Manners
Unfortunately, the external staircase reaches all the way to the edge of the base and blocks a large part of the pavement. It looks good from the side, but it is awkward if you want a believable street in front of the building.
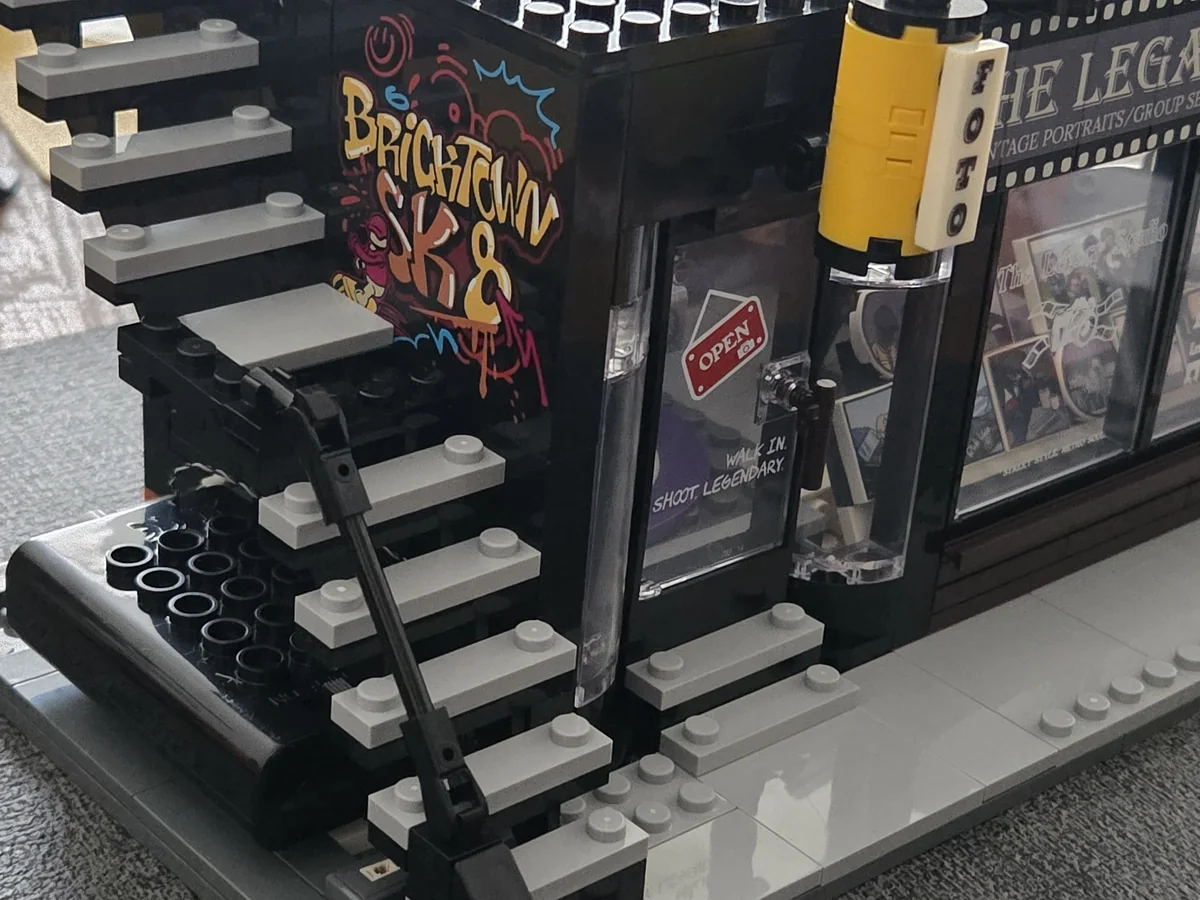
This should be an easy modification. Removing the small halfway landing would let the staircase shift further back and free more walking space. I plan to make that change on mine.
Until then, the figures will have to watch where they are going. Lumibricks still has not built them a hospital modular.
The Separate Photo Booth
A small photo booth sits beside the main building. It is a simple build, but the red curtains, black-and-white floor, blue stool and printed PHOTOS signs make it instantly recognisable. There is also a small screen and printed photo strips around the back.
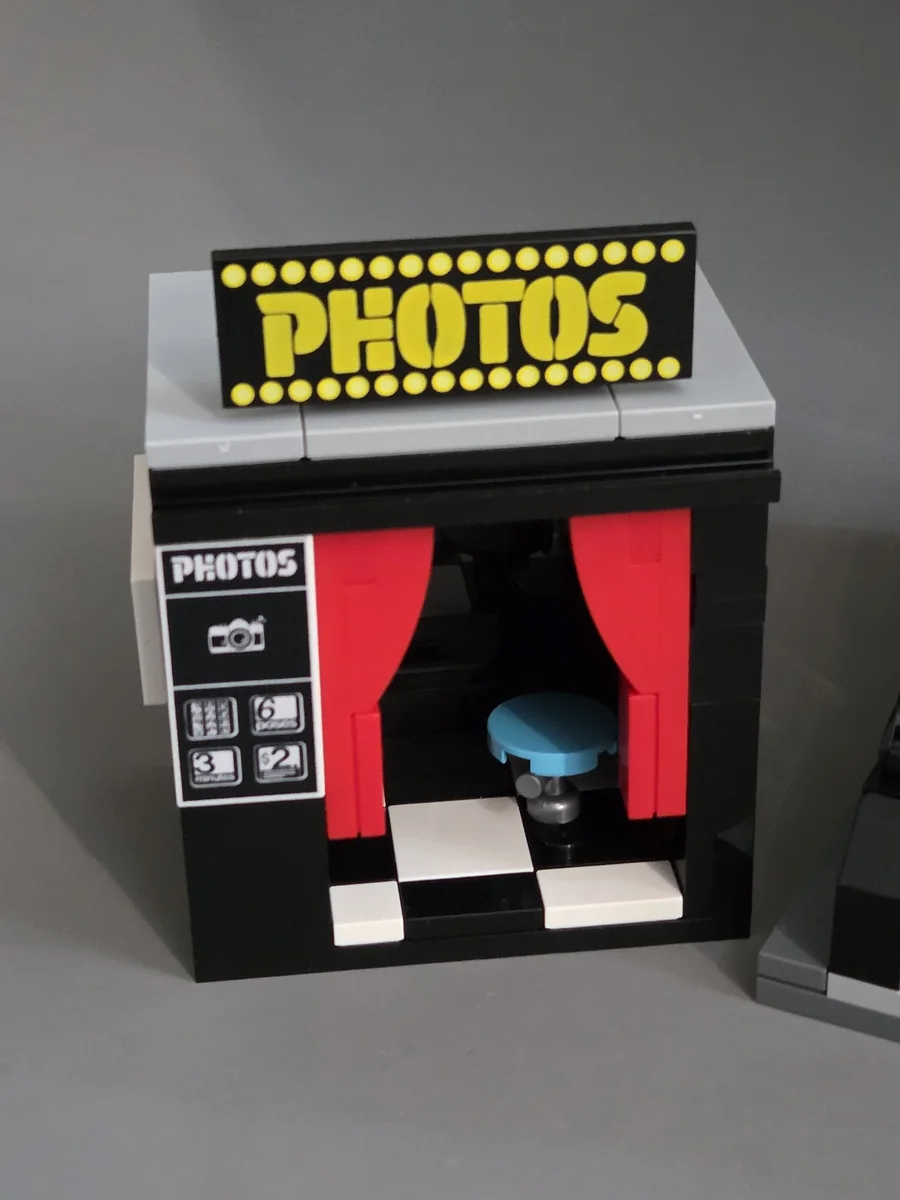
Because it is separate, you can place it beside the studio or use it elsewhere as a small city filler. That flexibility suits the whole idea behind this set. I would be very happy to see more little standalone street scenes, kiosks and park builds alongside these narrow modulars.
Lighting
The Corner Photo Studio has seven LEDs split across two independent systems. The upper switch controls the darkroom, moving between red and normal lighting. The lower switch gives the studio a steady white light or a repeated camera-flash effect.
The flash happens more often than it would during a real portrait session, but realism is not really the point. It is fun, immediately readable and gives the huge camera a reason to be the centrepiece of the ground floor.
From outside, the lighting brings the printed windows and signs to life. The shopfront spotlights are bright without washing out the details, while the warm and cool colours inside help separate the studio from the darkroom above.
Printed Parts and Figures
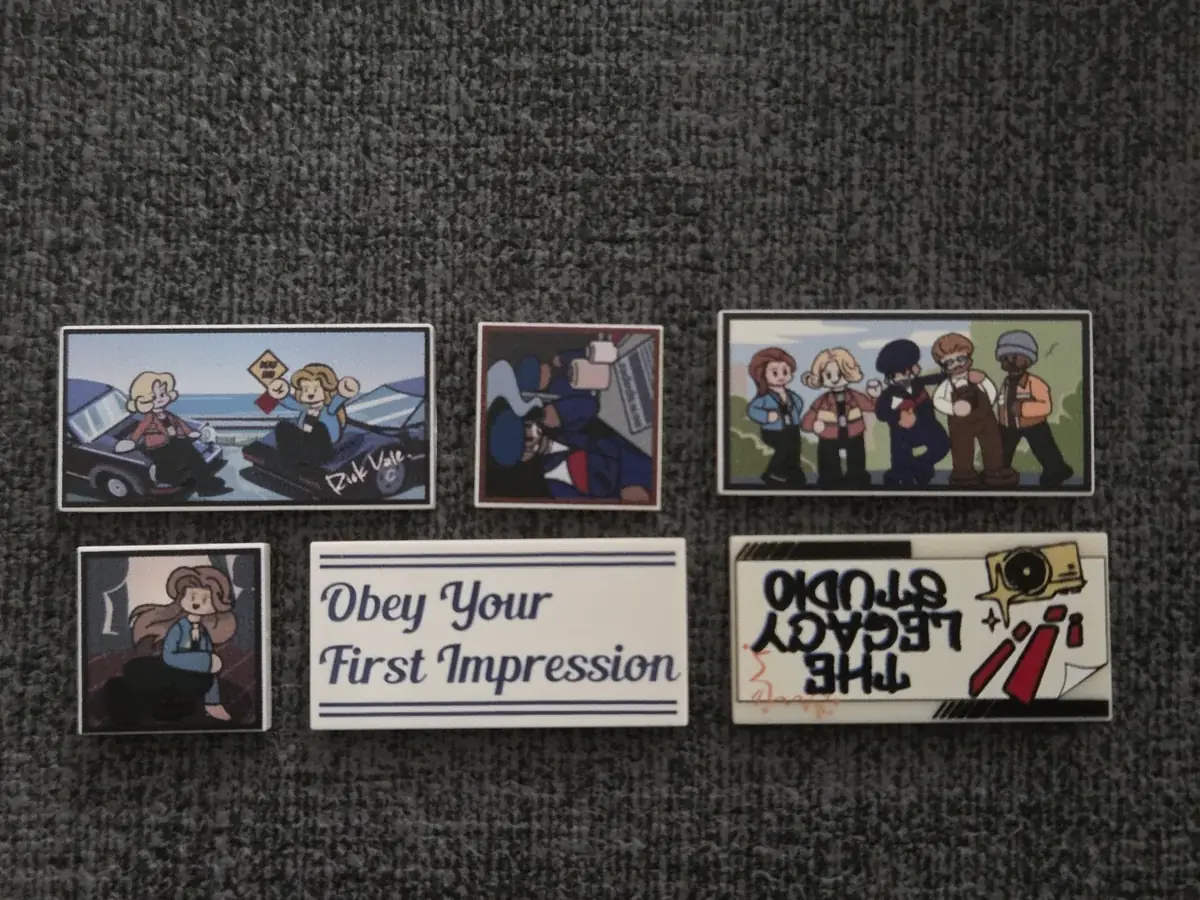
The 40 printed elements are used well. The main sign and clear shop windows do most of the visual work at street level, but the smaller details are just as useful. The darkroom has tiny photographs, the staircase and side wall have large graffiti pieces, the booth has its own signs and the studio is full of scene-specific props.
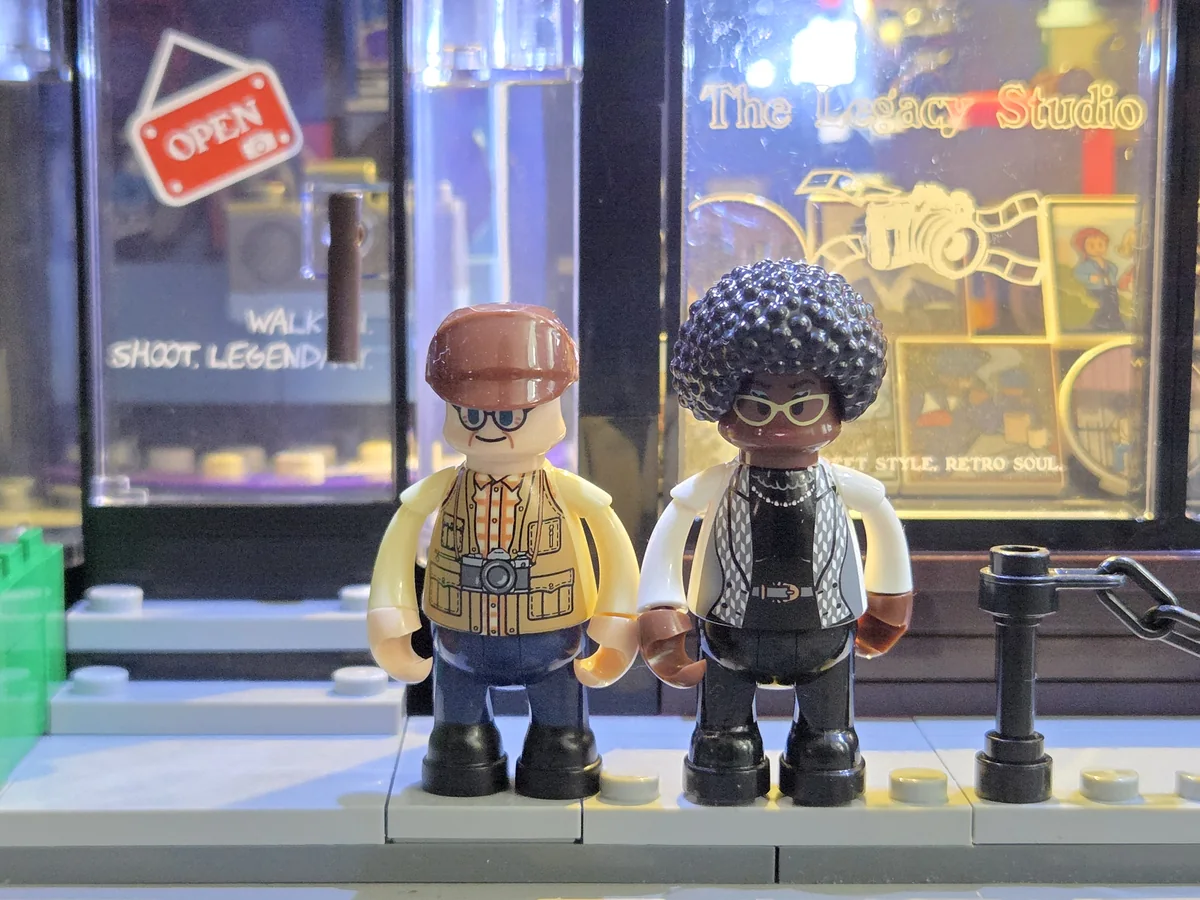
Two figures are included: the photographer and a customer. Their outfits fit the building and they look good outside the shop, although I would have liked one more customer or assistant to make the interior feel busier. With the studio, darkroom and photo booth all operating at once, two people are working a very demanding shift.
Pricing and Value
The official price is $79.99. I bought mine from Chowbrick for $70.19, which worked out at around £53 at the time.
At the price I paid, the value is excellent. You get 1,425 pieces, two figures, 40 printed elements, seven LEDs, two genuinely useful lighting systems and a mechanical backdrop feature. Even at the official price, it remains competitive for a detailed modular-style set with integrated lighting.
The compact footprint adds value in a less obvious way. A set is only useful if you have somewhere to put it, and this one offers a complete building without demanding another full baseplate. It works for smaller shelves, but it is just as useful in a large city where narrow buildings and small businesses help a street feel less repetitive.
Verdict
The Lumibricks Corner Photo Studio is a superb small modular. It has a strong facade, two distinctive interiors and enough mechanical and lighting features to make the reduced footprint feel like a design choice rather than a compromise.
The lower-floor access should have been better and the exterior staircase needs a small modification. Both are worth mentioning because they affect how you use the finished set.
However, none of them changes my overall view. The rotating backdrops are clever, the darkroom is excellent and the photo booth is a useful little extra. Most importantly, it proves that a compact modular can still feel complete.
This is one of my favourite sets of the year and an easy recommendation for Street Fusion collectors, shelf builders and anyone trying to make a brick city fit into the space they actually have.
Quick, varied and mechanically interesting.
Excellent format, but the lower floor and stairs need work.
The red darkroom and camera flash are excellent.
Strong at RRP and excellent at the price I paid.
Excellent
Where to Buy
I bought my set from Chowbrick, but current prices and availability can change. You can also check the official Lumibricks listing below.
Transparency: The Lumibricks button is an affiliate link, so I may earn a commission at no extra cost to you. Read the full Affiliate Disclosure for details.
Related Reading
Lumibricks Corner Photo Studio 19016 Official Listing
Lumibricks Barbershop 19012 Review
Lumibricks Adds Flagship Studios and Vignettes to May Lineup
Best Lumibricks Sets Guide for Beginners
You can also browse the rest of the Street Fusion range.
FAQ
How large is the Lumibricks Corner Photo Studio 19016?
The main building uses a narrow 32 x 16-stud format. Lumibricks lists the overall display at approximately 25.5 cm wide, 12.5 cm deep and 23.5 cm tall.
Does the Corner Photo Studio include lighting?
Yes. It includes seven LEDs across two independent systems. The upper darkroom can switch between red and normal lighting, while the ground-floor studio has steady lighting and a repeating camera-flash effect. Three AAA batteries are required and are not included.
Is the interior easy to access?
The removable upper facade gives excellent access to the darkroom. Ground-floor access is less successful because only the small entrance-side wall opens, so removing the upper floor is often the easiest way to position figures inside.