
Introduction
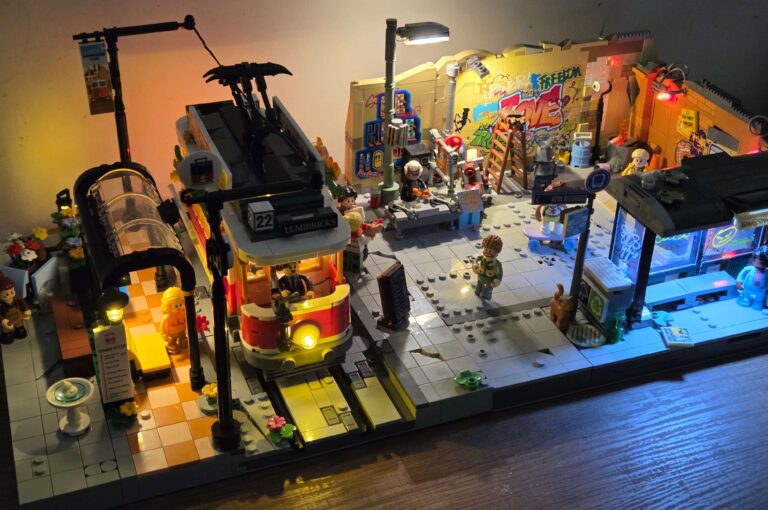
After building the Lumibricks Cyberpunk Apartment, I got inspired. I’ve had a Raspberry Pi knocking around for ages with nothing to use it for. I’ve always wanted to build a billboard for a LEGO city, but I never got round to it. Then it hit me – a Cyberpunk billboard would look way better than what I originally had in mind. I ordered a small 3.2-inch IPS screen and got to work.
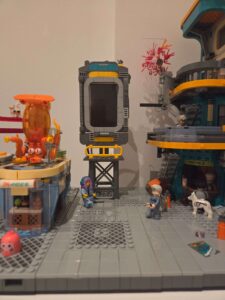
I wanted to make it fit right into the Cyberpunk “city.” With all the gorgeous lighting and atmosphere those sets create, a working billboard felt like the perfect addition.
The build
The first issue I ran into was how to actually build it. The Lumibricks sets use GoBricks elements, which I don’t have, but I do have plenty of LEGO pieces from past MOCs (My Own Creations).
As a lifelong LEGO fan, I had a flood of emotions – should I mix the bricks? Would the universe collapse? I decided to use LEGO bricks, but I built the billboard on a modular base similar to the Cyberpunk sets so it would still slot in neatly and be self contained.
Once the screen arrived, I started designing a casing for it and styling the billboard. I wanted to match the look of the Lumibricks Apartment, using the same colour palette so it looked like it belonged in the same city.
I also wanted it raised up high, so I built a tall stand and gave it a slightly futuristic look. I added some yellow fencing too – that colour just screams Cyberpunk to me.
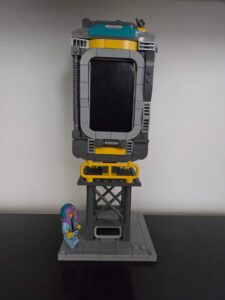
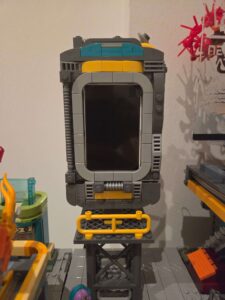
Finally, I created a base for the whole setup and tiled it off with a mix of tiles and studs so minifigs could be posed walking past or looking up at the display.
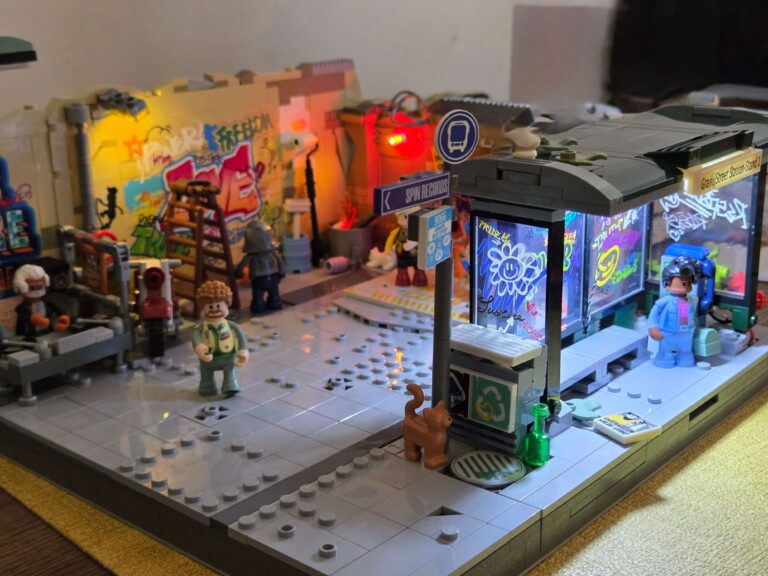
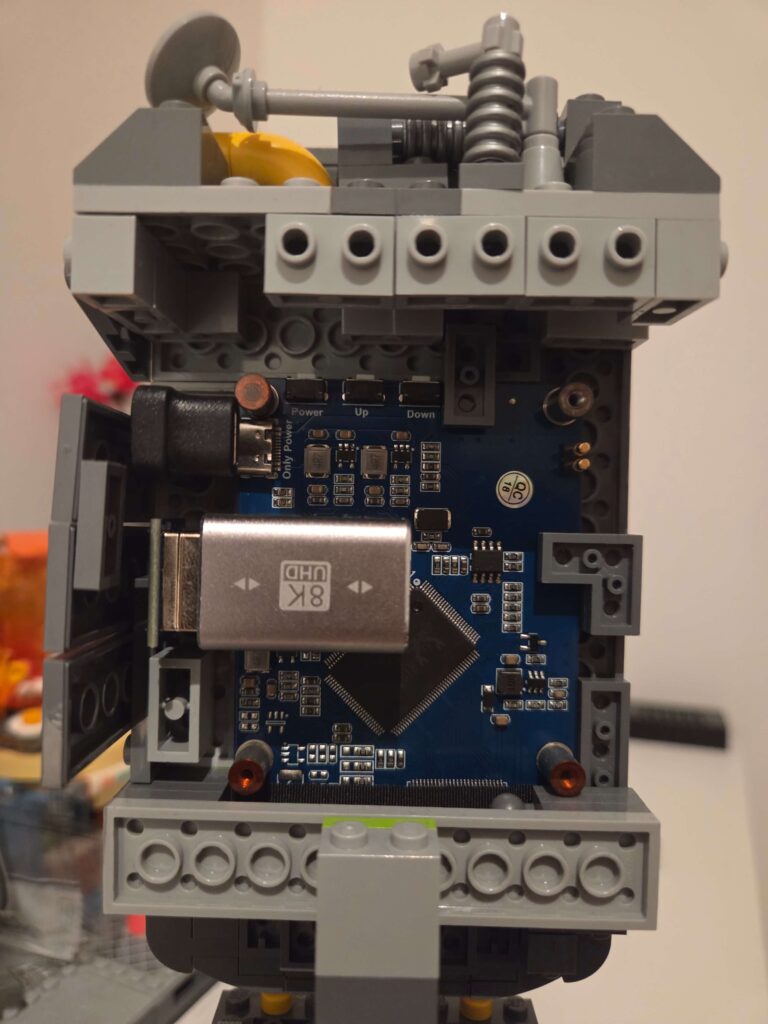
The Tech
Next came the techy bit. I installed the basic Raspberry Pi OS. All it needed to do was play videos on a loop. I then connected the 3.2 inch IPS screen to the Raspberry PI with an HDMI cable. Below you can see the screen integrated into the Lego build.
The Ads
I’ll admit, I have no clue how to make animations, and even if I did, it’s a time-consuming process. So I turned to AI. I came up with a few ad ideas and described them to ChatGPT, which generated the images I wanted. I then made some tweaks and touch-ups in Photoshop.
For animation, I was lucky enough to have a subscription to Adobe, which now includes AI animation tools. I explained how I wanted each ad to move, and it did a pretty good job. After that, I used a simple video editor to fix a few details I didn’t like. (There are loads of services that can animate images, and many offer free credits.)
The ideas I came up with for the ads were:
Sushi Izakaya – a promo for the Cyberpunk restaurant set that sits right next to the billboard.
LumiNet Corporation – a little nod to the darker side of Cyberpunk and Blade Runner. I imagined a giant mega-corp (a mix of “Lumi” and “net”). Hopefully Lumibricks never go that way in real life!
Underground Street Racing – because what’s a futuristic city without some illegal neon-lit racing?
The Brickify Band – every city needs its local music scene, so of course there’s a new album dropping… on Brickify, naturally.


Once the ads were finished, I copied them over to the Raspberry Pi, installed a video player, and set up a playlist to loop automatically. I configured the Pi to boot straight into the player and playlist, so I wouldn’t have to fiddle with it every time I switched it on.
One ad I never got around to adding was a Blade Runner reference to Joi.
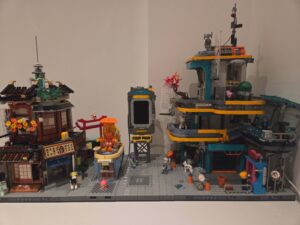
The final result
Hindsight
Looking back, I probably should’ve just used an old phone. It would have made the whole thing much simpler, and I only realised that after finishing the project. If you’re thinking of trying something similar, that’s definitely the easier route – just load your videos onto the phone and play them on loop. One power cable, zero setup, and no technical stress.
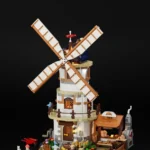
Take a look at my review of the Lumibricks Cyberpunk Apartment that inspired all this:
Review: Lumibricks (Funwhole) Cyberpunk Apartment (F9042)